Pages

Thursday, June 5, 2014

I just love when a PLAN...I mean PAGE comes together!

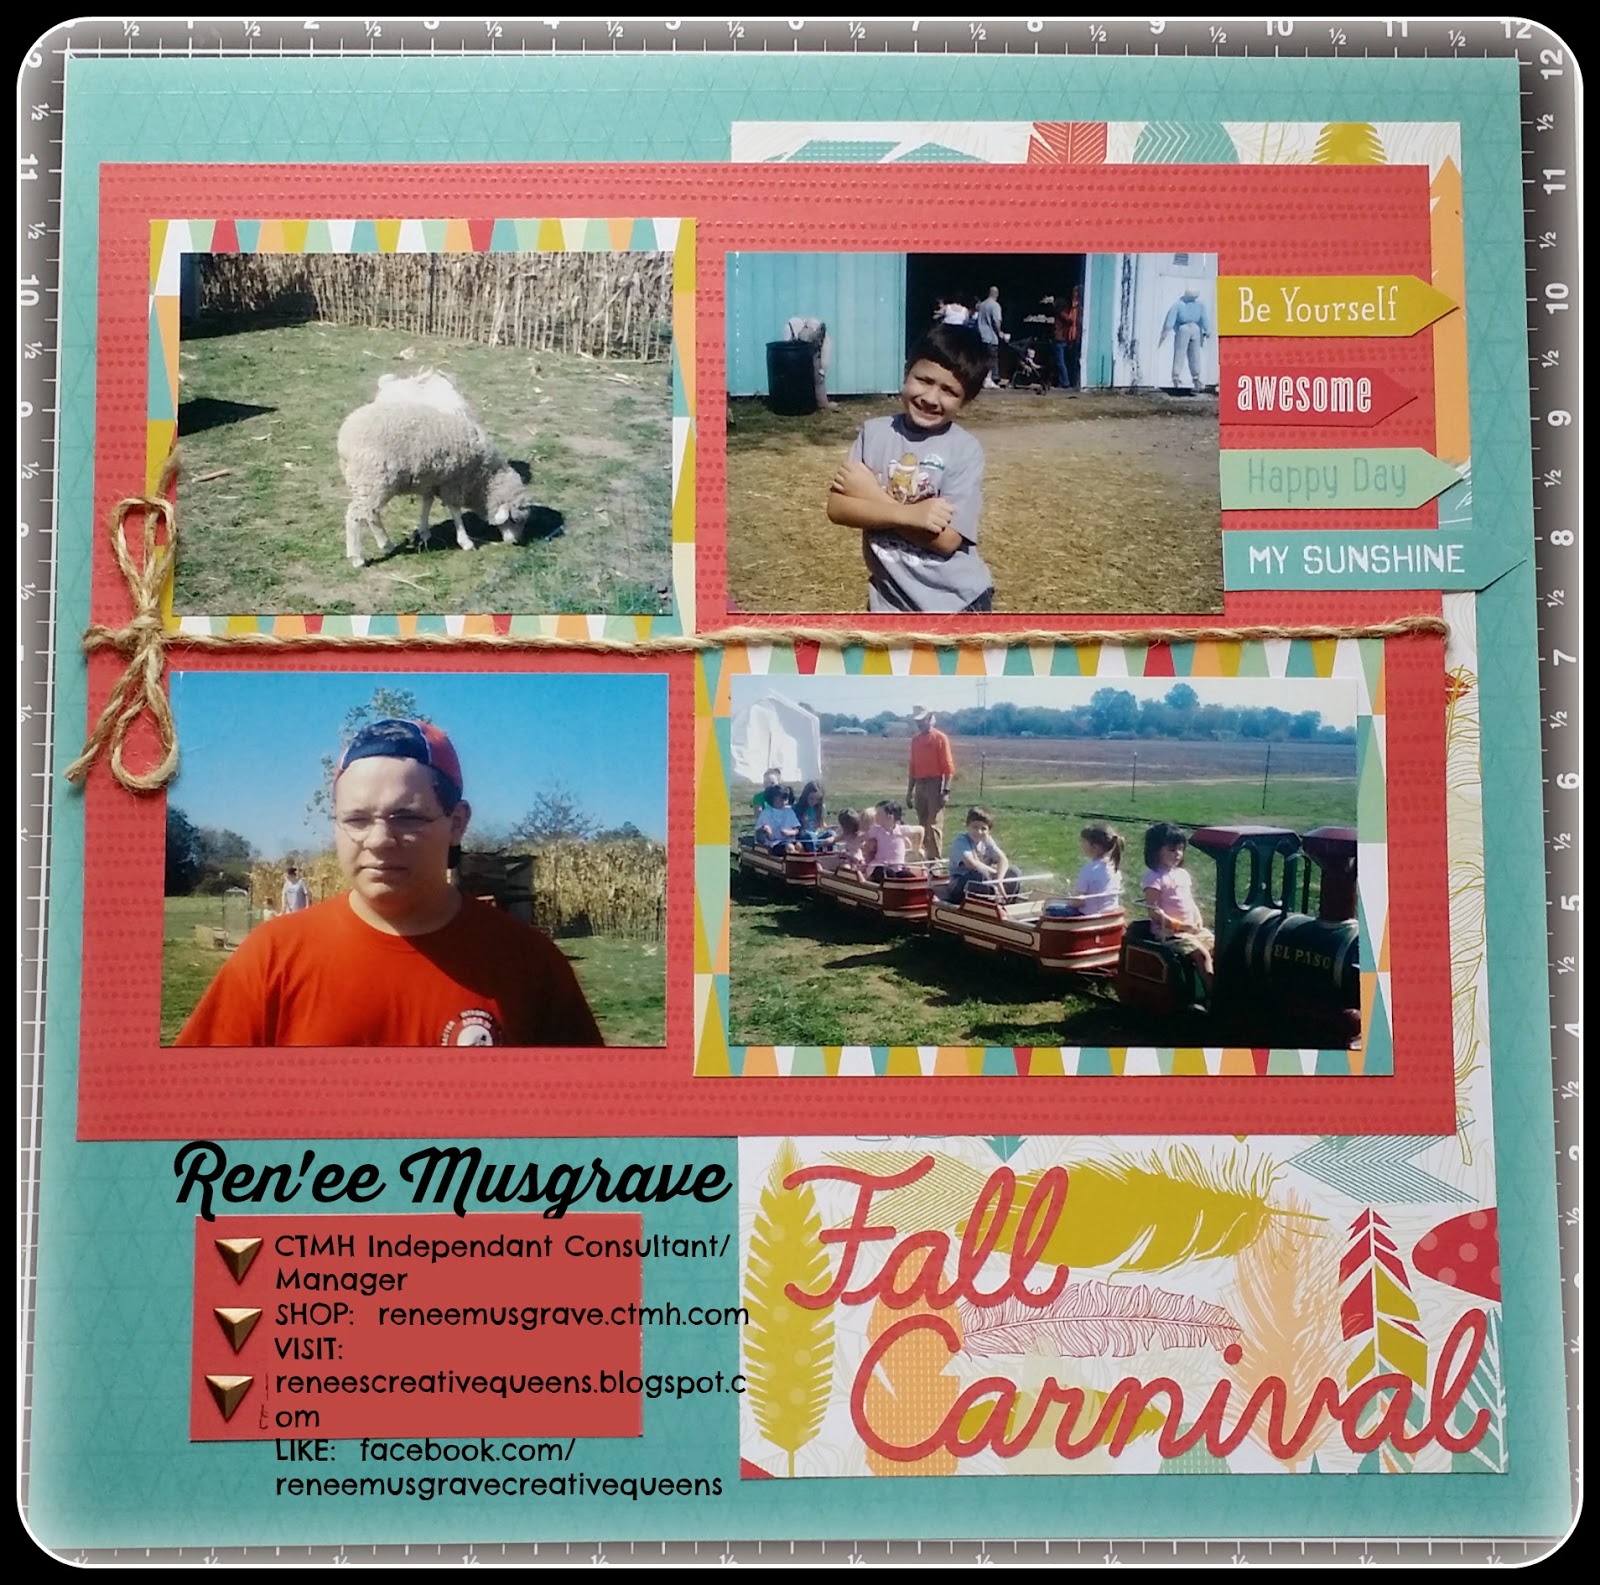
Today I've created a Scrapbook page layout just for one of our families special memories!  Back when both children were at home and in school.  We were trying to find pumpkins.  This place only had itty bitty pumpkins but they had a lot of other activities for the boys to do.  Hope you enjoy!

BTW-The paper is from last months National Scrapbooking Celebration.  If you like this collection, pm me on Facebook.  I have extra to sell.  


Items Used:
Baker's Twine
Durables Triangle Studs in Antiqued Gold
National Scrapbooking Paper collection
"Fall Carnival" cut from Cricut Gallery

Thanks for looking!
Be Blessed and Stay Creative!
Ren'ee

Tuesday, June 3, 2014

CAS(E) this Sketch #78


CAS(E) this Sketch #78

Today I'm entering into the CAS(E) this Sketch challenge.  I've created the card using CTMH products.  The movement of the diagonals seemed fluid to me.  I love the sentiment "BELIEVE IN YOURSELF".  Sometimes that is exactly what we needed reminded to do.


To create this card I used:
Believe in Yourself stamp set (C1574)

Thank you for taking a peek.  If you would like to purchase any of these products, follow the link provided or go to reneemusgrave.ctmh.com.

Be Blessed and Stay Creative!

Ren'ee

Monday, June 2, 2014

Party Favor Favorites!

How would you like to make some one of a kind invitations for a party?  This video shows how you can create some wonderful cupcake toppers, party favors and invitations with just a few settings of your Cricut machine.

Check it out!


To purchase the Artiste Cricut Cartridge or fun stamp set, go to reneemusgrave.ctmh.com or message me on facebook.

Be Blessed and Stay Creative!

Ren'ee

Saturday, May 31, 2014

June Workshop

Ready for a Jubilee???  

I am so excited to share this new workshop I've been creating.  This paper collection set is PERFECT for summertime!  I can't wait to put my July 4th or fair time pictures into these pages.

Here is what we will be creating:


  • The kit has 6 scrapbook pages and 4 cards pre-cut
  • Included in the Kit: Pre-cut patterned papers, Pre-cut cardstock papers, Pre-cut Cricut Images, Stamped Image (will require trimming with scissors), Baker Twine, Colonial White cards, Embossed Metal Badge Buttons, Bitty Sparkles, New Re-usable Zip Top bag, Information sheet with color photo and supply list
  • Additional Supplies Needed: Adhesive, Glue Dots, Scissors, Ink Daubers/Ink Stamp Pads/Stamps for page titles and to distress edges (if desired), Liquid Glass (if desired)
  • The workshop will be 3-4 hours long
  • Pre-registration and payment is required by June 11, 2014
  • Kit is $35.00
  • Snacks and drinks will be available
  • Dates will be set asap.  One date will be at the Stardust Hills Homeowners Association.  One will be at my home or public location.
If you are interested, message me on Facebook today!


Who wants some FREE gifts????
**When you refer a friend who purchases a kit, you'll receive a FREE gift!**

**When you purchase a kit and have a workshop/gathering of your own-you'll receive a FREE stamp pad!**

Be Creative and Stay Blessed!

Ren'ee

Creative Queens: The Everything ABC's Blog -Letter K

Creative Queens: The Everything ABC's Blog -Letter K: Welcome to the Everything ABC's Blog! For this hop we will be featuring the letter K.  This may be the name of a paper, a stamp...

Thursday, May 29, 2014

The Everything ABC's Blog -Letter K


Welcome to the Everything ABC's Blog!

For this hop we will be featuring the letter K.  This may be the name of a paper, a stamp set or an embellishment.  Whatever the crafter has chosen as their K element will be featured in their post.  

If you have just hopped onto my blog, please start at the beginning at Linda's blog~Scrappy Therapy.

If you came from Lisa Plummer~Flaunt Your Creativitythen you're on the right track!

I have chosen a "K"ite for my inspiration.  This is a special fold card.


How to create your very own Kite Card:
To create this card I followed a Kite Card Tutorial by Qbees Quest.
1)  Begin with a piece of cardstock 10 x 4".  On the long side, score at 5".
2)  On both long sides make a mark on the edge at 3" and 7"
3)  On both short sides make a mark on the edge at 2"
4)  Score from the 3" mark on the one long side to the 7" mark on the other side.  This will be a diagonal score which runs across the 5" score line
5)  Score from the opposite 3" mark to the other 7" mark.  You should now have score lines in the shape of an "x" that cross the 5" score line in the center.
6)  Using a cutter or scissors, cut off the four corners of the cardstock from the 3" marks on the long sides to the 2" marks on the short sides.
7)  Fold the card in half on the 5" score line
8)  Tuck in the corners of the card along the score lines
9)  Decorate your card.  I distressed the edges of the card with lagoon ink.  I cut patterned Skylark paper for the outside and inside of the card.  Before adhering the patterned paper I distressed it with Saddle Ink.  I stamped Happy Birthday for the sentiment.  From my stash, I placed the kites tail on the front of the card with glue dots.  To give the card more bling I have added Bitty Sparkles and Sparkle Fourishes.

Items Needed to create this card:
Lagoon Ink Pad (Z2195)
Saddle Ink Pad (Z2171)
Skylark Paper (X7177B)
Colonial White Cardstock (1388)
3X3 Acrylic Block Y1006
Sponge Dauber (Z1938)
Joyful Birthday Stamp Set (B1419)
Bitty Sparkles (Z1263)
Sparkle Fourishes (Z1708)
Ribbon from my Stash
**If you would like to purchase any of these items, follow the link or go to reneemusgrave.ctmh.com.


Your next stop on our Everything ABC's blog hop is Pam Trostle~Pam's Crafty Creations.
In case you get lost along the way go to Scrappy Therapy for a complete list of participants!


Thank you for visiting.  I hope you like the inspiration!

Be Creative & Stay Blessed,

Ren'ee 

Thursday, May 22, 2014

Teacher Appreciation Cards

With great presents, comes great cards!  Right?!?

Today I have created cards to show 2 special teachers and 1 bus driver how they have been appreciated all year long.  I really used my Cricut Explore for a lot of this card.  It was easy peasy to just check which images I wanted and press cut.  PRESTO!  Depending on which Cricut you have, you may have to play with the proper sizes for your card.

Cuts:
-Base cardstock in Barn Red (X5637) cut at 8" x 6"-scored and folded at 4".
-Coordinating cardstock layer (I used non-CTMH alphabets and apples) cut at 3 3/4" x 5 3/4"
-Circle cut using Cricut at 2 3/4" using Cricut Art Philosphy Cartridge (Z1906)
-Scallop Circle cut using Cricut at 3" using Cricut Art Philosophy Cartridge (Z1906)
-Number border cut at 5 3/4" using Cricut Artbooking Cartridge (Z1686)
-Owl and Bus (non-CTMH) at 3" using Cricut Explore
-Black Exclusive Ink Pad (Z2105)
-Red and Green ribbon from stash

Directions:
1.  Glue Number Border to printed cardstock.
2.  Create bow and tape to printed cardstock.
3.  Stamp "Thank you" to white circle.  Tape white circle to scalloped circle.  Tape in place.
4.  Glue together owl or bus image.  Using foam dots, adhere image to card.
EASY PEASY!!!!!

On the inside of the card using white inked pen, I wrote "4 a great year!".  I think they will enjoy the cards and the Sticky Note Holders that I have made.

If you would like to purchase any CTMH items, please visit my shopping site at reneemusgrave.ctmh.com.  I'd love to hear your comments or questions!

Stay blessed and Crafty!
Ren'ee